
DisForm.vue
DisForm.vue
For developers
A deep dive into the code behind the Template-Manager, which comprises the mDIS interactive form designer.
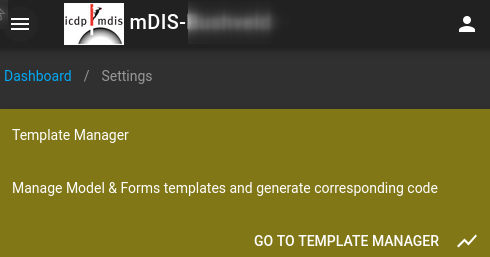
Purpose of DisForm
DisForm is a Vue component used to filter, list, and update records of a data model (table). Using the Template‑Manager, mDIS Admins design tables/models and input forms typically based on DisForm. The generated artifacts (Vue, JSON, PHP files) can then be customized. In Legacy DIS, this process was known as specialization.
Note
Files src/components/DisForm.vue and its container src/components/DisSmartForm.vue should not be changed by any user.
The <template> section of DisForm typically contains two other Form components which should not be changed either:
DisFilterForm.vue: Implements the Filter Bar at the top of each form. It renders filter widgets and a filter‑by‑value dialog, updates URL query parameters, and emits change events so the list below refreshes accordingly.DisDataTable.vue, which lists and paginates the linked table records. The listing depends on the current filter settings, visible as URL parameters in the browser's address bar on the current page. Alternatively, the listing may also depend on the current filter-by-value settings obtained from theDisFilterForm.vuecomponent (in case this dialog box was used).
The <script> section of DisForm contains a rich data array and a lot of props and methods. There are too many to discuss them here. Most of them are either click handlers for the many buttons inside the navigation bar and filter bar, or other types of event listeners.
Tutorial: customizing a .vue file
Form Specialization: Data Fields
Forms generated by mDIS admins are typically based on DisForm. The new forms can be customized or specialized. The remainder of this document is a tutorial on how to perform various customizations on a file SampleForm.vue. (You might use a different name for your form, and that's okay.)
About this Tutorial
- This tutorial demonstrates how to customize the forms with a text editor, by editing the generated source code.
- Therefore, the Templates-Manager GUI plays only a minor role in this tutorial, mainly during initial form generation.
- If you follow along in your IDE, copy the sections in green font from the code blocks below. After pasting them into your
SampleForm.vuefile (or equivalent), remove the plus signs ( + ) from the beginning of each line! - If you work in development mode (
npm run serve), after saving any.vuefile, the changes should be immediately visible in the browser. In production mode, you need to runnpm run build.
To make form specialization easier to understand, we will start from this example:

A simple form with four fields. Here are the model templates and the form templates, both in JSON format:
Model Template
Generate this model with the Template-Manager. Alternatively, save this code into a .json file, then upload it with the "Upload a model template (*.json)" feature of the Template-Manager. "Save & Generate" the model.
On lines 2–4, you can change the "module", "name", and "table" entries. ("module" means "TableSet", "name" is the model name as it appears on the page, and "table" is the database table name. Avoid blanks.)
{
    "module": "Sa",
    "name": "Sample",
    "table": "sa_sample",
    "importTable": null,
    "parentModel": "",
    "columns": {
        "id": {
            "name": "id",
            "importSource": "",
            "type": "integer",
            "size": 11,
            "required": false,
            "primaryKey": true,
            "autoInc": true,
            "label": "ID",
            "description": "",
            "validator": "",
            "validatorMessage": "",
            "unit": "",
            "selectListName": "",
            "calculate": "",
            "defaultValue": ""
        },
        "title": {
            "name": "title",
            "importSource": "",
            "type": "string",
            "size": 50,
            "required": true,
            "primaryKey": false,
            "autoInc": false,
            "label": "Title",
            "description": "The title of this record",
            "validator": "",
            "validatorMessage": "",
            "unit": "",
            "selectListName": "",
            "calculate": "",
            "defaultValue": ""
        },
        "slug": {
            "name": "slug",
            "importSource": "",
            "type": "string",
            "size": 100,
            "required": false,
            "primaryKey": false,
            "autoInc": false,
            "label": "Slug",
            "description": "A unique kebab-case title",
            "validator": "",
            "validatorMessage": "",
            "unit": "",
            "selectListName": "",
            "calculate": "",
            "defaultValue": ""
        },
        "depth": {
            "name": "depth",
            "importSource": "",
            "type": "double",
            "size": null,
            "required": true,
            "primaryKey": false,
            "autoInc": false,
            "label": "Depth",
            "description": "Depth in meters",
            "validator": "",
            "validatorMessage": "",
            "unit": "",
            "selectListName": "",
            "calculate": "",
            "defaultValue": ""
        },
        "depth_mm": {
            "name": "depth_mm",
            "importSource": "",
            "type": "double",
            "size": null,
            "required": true,
            "primaryKey": false,
            "autoInc": false,
            "label": "Depth Mm",
            "description": "Depth in millimeters",
            "validator": "",
            "validatorMessage": "",
            "unit": "",
            "selectListName": "",
            "calculate": "",
            "defaultValue": ""
        }
    },
    "indices": {
        "pk_id": {
            "name": "pk_id",
            "type": "PRIMARY",
            "columns": [
                "id"
            ]
        },
        "unique_slug": {
            "name": "unique_slug",
            "type": "UNIQUE",
            "columns": [
                "slug"
            ]
        }
    },
    "foreignkeys": [],
    "createdAt": 1556631283,
    "modifiedAt": 1556631295,
    "generatedAt": 1556631298,
    "fullName": "SaSample"
}
Form Template
Generate this form with the Forms-Manager, or upload it with the "Upload a form template (*.json)" feature of the Template-Manager. "Save & Generate" the form. Note the file names that are being generated.
{
    "name": "sample",
    "dataModel": "SaSample",
    "fields": [
        {
            "name": "title",
            "label": "Title",
            "description": "The title of this record",
            "validators": [
                {
                    "type": "required"
                },
                {
                    "type": "string"
                }
            ],
            "formInput": {
                "type": "text",
                "disabled": false,
                "calculate": "",
                "jsCalculate": ""
            },
            "group": "-group1",
            "order": 0
        },
        {
            "name": "slug",
            "label": "Slug",
            "description": "A unique kebab-case title",
            "validators": [
                {
                    "type": "string"
                }
            ],
            "formInput": {
                "type": "text",
                "disabled": false,
                "calculate": "",
                "jsCalculate": ""
            },
            "group": "-group1",
            "order": 1
        },
        {
            "name": "depth",
            "label": "Depth",
            "description": "Depth in meters",
            "validators": [
                {
                    "type": "required"
                },
                {
                    "type": "number"
                }
            ],
            "formInput": {
                "type": "text",
                "disabled": false,
                "calculate": "",
                "jsCalculate": ""
            },
            "group": "Meta Data",
            "order": 0
        },
        {
            "name": "depth_mm",
            "label": "Depth Mm",
            "description": "Depth in millimeters",
            "validators": [
                {
                    "type": "required"
                },
                {
                    "type": "number",
                    "min": null,
                    "max": null
                }
            ],
            "formInput": {
                "type": "text",
                "disabled": false,
                "calculate": "[depth] * 100",
                "jsCalculate": "this.formModel['depth'] * 100"
            },
            "group": "Meta Data",
            "order": 1
        }
    ],
    "filterDataModels": [],
    "requiredFilters": [],
    "subForms": [],
    "supForms": [],
    "createdAt": 1556631418,
    "modifiedAt": 1556631472,
    "generatedAt": 1556631490
}
With this example, we will demonstrate a typical form specialization case.
The first step is to remove the .generated extension from the generated form file. In directory src/forms, rename the file SampleForm.vue.generated to SampleForm.vue.
In the TemplatesManager/FormsManager GUI, a warning appears:
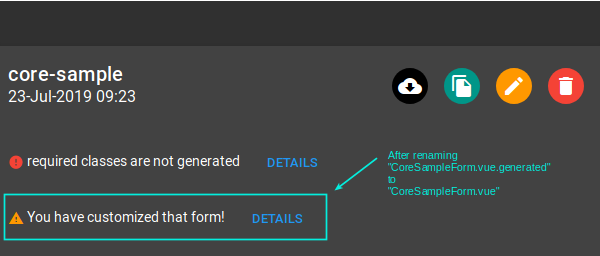
Be careful during later runs of the form generator for that model; you might overwrite your own changes. Put the files you customized under version control (git). For this tutorial, this is not really necessary.
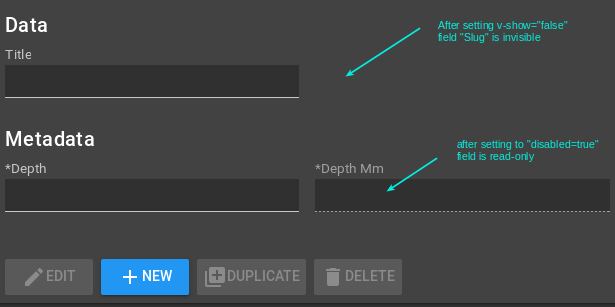
Toggle editable/uneditable
In SampleForm.vue, find the text field you want to edit, and simply change the value of the disabled property from false to true:
<DisTextInput
    :class="{'c-dis-form__input': true, 'c-dis-form__input--modified': formScenario === 'edit' && selectedItem['title'] !== formModel['title']}"
-    :disabled="false"
+    :disabled="true"
    :validators="validators['title']"
    name="title"
    label="Title"
    :serverValidationErrors="serverValidationErrors"
    hint="The title of this record"
    v-model="formModel['title']"
    :readonly="formScenario === 'view'"/>
This edit can also be done via the Template manager. But for demonstration purposes, we change the file
src/forms/SampleForm.vue.
Hide/unhide
This edit is similar to the previous edit above. But this time, add the attribute v-show to control the field visibility:
<DisTextInput
    :class="{'c-dis-form__input': true, 'c-dis-form__input--modified': formScenario === 'edit' && selectedItem['title'] !== formModel['title']}"
    :disabled="false"
+    v-show="false"
    :validators="validators['title']"
    name="title"
    label="Title"
    :serverValidationErrors="serverValidationErrors"
    hint="The title of this record"
    v-model="formModel['title']"
    :readonly="formScenario === 'view'"/>
If the line with v-show is not there, you must add it.
Now the form should look like this (details can differ):
Change field widths
The fields are arranged using a Vuetify layout scheme called "Grid System". You are free to modify the grid, and thus to rearrange the input fields, as you wish. As an example, we will change the layout from a 2x2 grid to a 4x1 grid, thus rendering every field on its own full row. We accomplish this by removing the four "md3 sm6" snippets from the SampleForm.vue file.
<v-layout wrap mb-3>
    <v-flex xs12 pl-2 pt-2>
        -group1
    </v-flex>
-    <v-flex lg2 md3 sm6 xs12 pr-2 pl-2>
+    <v-flex lg2         xs12 pr-2 pl-2>
        <DisTextInput name="title"/>
    </v-flex>
-    <v-flex lg2 md3 sm6 xs12 pr-2 pl-2>
+    <v-flex lg2         xs12 pr-2 pl-2>
        <DisTextInput name="slug"/>
    </v-flex>
</v-layout>
<v-layout wrap mb-3>
    <v-flex xs12 pl-2 pt-2>
        Meta Data
    </v-flex>
-    <v-flex lg2 md3 sm6 xs12 pr-2 pl-2>
+    <v-flex lg2         xs12 pr-2 pl-2>
        <DisTextInput name="depth"/>
    </v-flex>
-    <v-flex lg2 md3 sm6 xs12 pr-2 pl-2>
+    <v-flex lg2         xs12 pr-2 pl-2>
        <DisTextInput name="depth_mm"/>
    </v-flex>
</v-layout>
These changes remove the grid rules for medium (md) and small (sm) screens, treating all screens as extra small. This forces full‑width rendering on most screens. (The terms
md3,sm6, etc. are from Vuetify's 12‑column flexbox grid, which is inspired by Bootstrap's grid and implements Google's Material Design.)
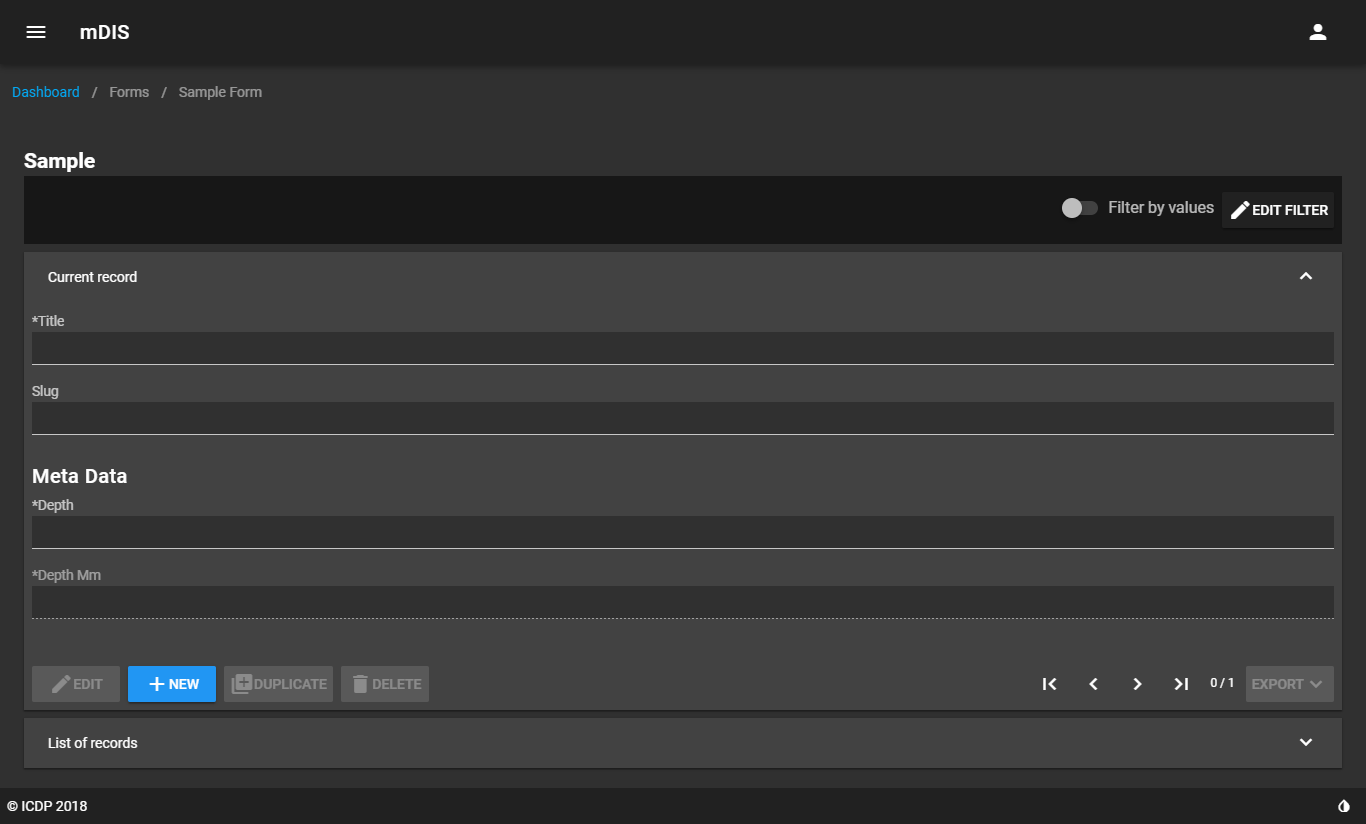
Result:
Note the larger widths of the input fields after changing the 2x2 grid to a 4x1 grid.
Change field order
Changing the order of the fields is also possible, but it's not shown here. Simply switch the positions of any DisTextInput elements inside the Sample.vue file.
This feature is available via the Template manager, too. Drag-and-drop the field positions.
Set label/hint
This change can be demonstrated with another couple of very simple one-liners:
<DisTextInput
    :class="{'c-dis-form__input': true, 'c-dis-form__input--modified': formScenario === 'edit' && selectedItem['depth'] !== formModel['depth']}"
    :disabled="false"
    :validators="validators['depth']"
    name="depth"
-    label="Depth"
+    label="Driller Depth"
    :serverValidationErrors="serverValidationErrors"
-    hint="Depth in meters"
+    hint="Driller Depth in meters"
    v-model.number="formModel['depth']"
    :readonly="formScenario === 'view'"/>
(Result: Picture not shown)
Available via the Template manager, too.
Calculated fields
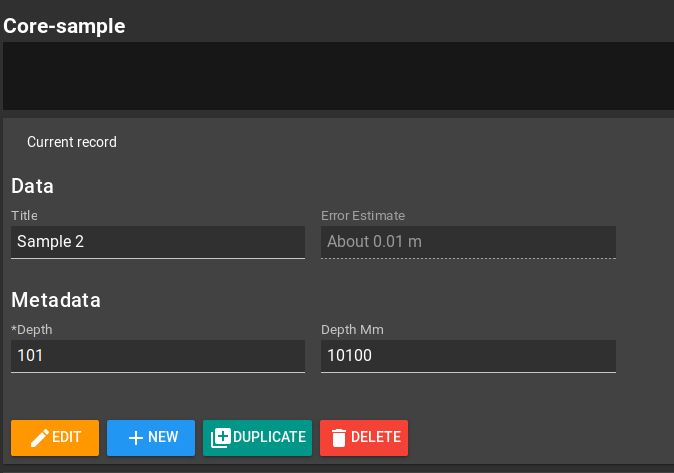
Let's try an advanced example: Add a new field error_estimate that is calculated on the fly.
In principle, available via Templates/Forms Manager GUI, too. Here we accomplish this in code, with more fine-grained control.
For a more robust approach that scales across forms, see the separate note on Pseudo fields.
In the <script> element of the Sample.vue file, after the this.simpleFields = ... line, insert the following JavaScript code.
This JS snippet adds a text field definition error_estimate that does not exist in the model. Nevertheless, it will be displayed on the form:
this.simpleFields = JSON.parse('[{"name":"title","label":"Title","description":"The title of this record","group":"-group1","order":0,"inputType":"text"},{"name":"slug","label":"Slug","description":"A unique kebab-case title","group":"-group1","order":1,"inputType":"text"},{"name":"depth","label":"Depth","description":"Depth in meters","group":"Meta Data","order":0,"inputType":"text"},{"name":"depth_mm","label":"Depth Mm","description":"Depth in millimeters","group":"Meta Data","order":1,"inputType":"text"}]')
+    this.simpleFields.push({
+      name: 'error_estimate',
+      label: 'Error Estimate',
+      description: 'Displays an error estimate of the Driller Depth',
+      group: 'Meta Data',
+      order: 2,
+      inputType: 'text'
+    })
    this.requiredFilters = JSON.parse('[]')
    this.subForms = JSON.parse('[]')
Previously, in Section "Hide/unhide", you have changed a <DisTextInput> element by setting v-show= "false". In the <template> element of the Sample.vue file, find that <DisTextInput> element. Immediately before the opening <DisTextInput>, add the following HTML/Vue code (without +s). The green snippet defines an input field for the new field error_estimate:
    <v-flex xs12 pr-2 pl-2>
        <DisTextInput
            :class="{'c-dis-form__input': true, 'c-dis-form__input--modified': formScenario === 'edit' && selectedItem['depth_mm'] !== formModel['depth_mm']}"
            :disabled="true"
            :validators="validators['depth_mm']"
            name="depth_mm"
            label="Depth Mm"
            :serverValidationErrors="serverValidationErrors"
            hint="Depth in millimeters"
            v-model.number="formModel['depth_mm']"
            :readonly="formScenario === 'view'"/>
    </v-flex>
+    <v-flex xs12 pr-2 pl-2>
+        <DisTextInput
+            :class="{'c-dis-form__input': true, 'c-dis-form__input--modified': formScenario === 'edit' && selectedItem['error_estimate'] !== formModel['error_estimate']}"
+            :disabled="true"
+            :validators="validators['error_estimate']"
+            name="error_estimate"
+            label="Error Estimate"
+            :serverValidationErrors="serverValidationErrors"
+            hint="Displays an error estimate of the Driller Depth"
+            v-model="formModel['error_estimate']"
+            :readonly="formScenario === 'view'"/>
+    </v-flex>
</v-layout>
Developers: It is important to make the field reactive. We do this by binding
formModel['error_estimate']object tov-model, see the third green line from below.
At this time, we have a new text field error_estimate, but the field is empty. This is because the form does not do any estimations yet.
In the <script> element of the Sample.vue file, add this JavaScript code. This code defines a custom anonymous function (){ } with a primitive "error estimation algorithm".
Add the this.calculatedFields['error_estimate'] object property:
this.calculatedFields = {}
    this.calculatedFields['depth_mm'] = function () {
      return this.formModel['depth'] * 100
    }
+    this.calculatedFields['error_estimate'] = function () {
+      if (this.formModel['depth'] > 1000) {
+        return 'About 1 m'
+      }
+      if (this.formModel['depth'] > 500) {
+        return 'About 0.5 m'
+      }
+      if (this.formModel['depth'] > 250) {
+        return 'About 0.10 m'
+      }
+      if (this.formModel['depth'] > 100) {
+        return 'About 0.01 m'
+      }
+      return 'Not Enough Data!'
+    }

    this.simpleFields = JSON.parse('[{"name":"title","label":"Title","description":"The title of this record","group":"-group1","order":0,"inputType":"text"},{"name":"slug","label":"Slug","description":"A unique kebab-case title","group":"-group1","order":1,"inputType":"text"},{"name":"depth","label":"Depth","description":"Depth in meters","group":"Meta Data","order":0,"inputType":"text"},{"name":"depth_mm","label":"Depth Mm","description":"Depth in millimeters","group":"Meta Data","order":1,"inputType":"text"}]')
GUI Result. Note the new "Error Estimate" text field in the form.
However: The table with the "Error Estimate" is not shown here.
Heads-up:
The table at the bottom of the page (a DisDataTable component) still renders the new column Error Estimate as empty.
The table can only show values that arrive from the API, and our ad-hoc calculated field lives purely in the form state, so the generated column has nothing to display yet. In real projects you can close this gap in a few different ways:
- Extend the API (or the code generator) to project extra attributes such as
error_estimate,person_full_name, or organisation labels so every row already carries display and sort keys.- Back the form with a SQL view or materialized table that performs the joins once in the database.
- Add a PHP/Yii behaviour or trigger that denormalises lookup values into dedicated columns when records change.
- As a last resort, enrich the current table page in Vue by batching the lookups, understanding that sorting will stay server-side only when the backend provides the sortable value.
Exercises
- Test the form reactivity: Update any value of any record. Are the calculated fields updated immediately? Are they displayed correctly?
- Add a similar calculation rule for a "Depth mm" field. It should take the value of Depth (m) and multiply it with 100.
Vue 2 Slots
Vue slots allow you to inject custom content, such as instructions or extra components, into forms and other Vue components. In mDIS, slots are used for form specialization and customization. For a detailed guide and examples, see the Vue 2 Slots in mDIS documentation.