
JavaScript
JavaScript
Build your own reports and data analyses. Using the mDIS REST API, you can get mDIS data independently from any predefined forms and reports.
All you need is a current login to mDIS. You need at least web access to mDIS.
Actually, it is helpful if you have physical access to the file system of the mDIS backend and some programming skills.
If you do not have such access, do the "In a Browser Console" tutorial described below.
If you do have shell access, e.g. inside your own mDIS VirtualBox, then you can do the "full" tutorial.
You also need to know the exact Primary Key IDs for a valid current hole and site dataset in your mDIS.
Does not work
2020: The mDIS instance that this tutorial refers to is no longer online. Update coming soon.
mDIS REST API access with JavaScript
This tutorial demonstrates 3 methods to get data from mDIS with JavaScript.
- As a Web page
- In a Browser console
- As a Node script (coming soon)
This tutorial does not demonstrate how to edit data (create, delete, duplicate, etc.). Such API calls are available, but this tutorial focuses on the simple case of getting data in a read-only mode.
The tutorials use data from the ICDP DSEIS Project. To load this dataset, you need to run the seed/example-dump Yii migration. You can also work with your own mDIS data, but then some URL parameters must be changed accordingly.
Tutorial 1: As a Web page
Step-by-step introductions are displayed further below.
What the JavaScript code does
- login to mDIS
- fetch some data
- display data as a table
Your task
It is your task to build a web page that displays a data table. Use copy-and-paste.
- create an empty HTML file
- Paste some HTML code into this file
- Load the (incomplete) web page
- Paste some JavaScript code into the HTML file.
- Copy two JavaScript modules (files) to the web server
- Load the (now complete) web page
HTML File
Inside your mDIS VirtualBox instance, open a file editor, navigate to folder web/. In there, create an empty page apitest.html.
Copy and paste in this code:
HTML Code
<!DOCTYPE html>
<html lang='en'>

<head>
    <meta charset="UTF-8">
    <meta name="viewport" content="width=device-width, initial-scale=1.0">
    <meta http-equiv="X-UA-Compatible" content="ie=edge">
    <title>mDIS data</title>
    <!-- Bootstrap 4 and jQuery 3 and DataTables CSS and JS-->
    <link rel="stylesheet" href="https://stackpath.bootstrapcdn.com/bootstrap/4.3.1/css/bootstrap.min.css"
        integrity="sha384-ggOyR0iXCbMQv3Xipma34MD+dH/1fQ784/j6cY/iJTQUOhcWr7x9JvoRxT2MZw1T" crossorigin="anonymous">
    <link rel="stylesheet" href="//cdn.datatables.net/1.10.19/css/jquery.dataTables.min.css">

    <script src="https://ajax.googleapis.com/ajax/libs/jquery/3.4.1/jquery.min.js"></script>
    <script src="https://cdnjs.cloudflare.com/ajax/libs/popper.js/1.14.7/umd/popper.min.js"
        integrity="sha384-UO2eT0CpHqdSJQ6hJty5KVphtPhzWj9WO1clHTMGa3JDZwrnQq4sF86dIHNDz0W1"
        crossorigin="anonymous"></script>
    <script src="https://stackpath.bootstrapcdn.com/bootstrap/4.3.1/js/bootstrap.min.js"
        integrity="sha384-JjSmVgyd0p3pXB1rRibZUAYoIIy6OrQ6VrjIEaFf/nJGzIxFDsf4x0xIM+B07jRM"
        crossorigin="anonymous"></script>
    <script src="//cdn.datatables.net/1.10.19/js/jquery.dataTables.min.js"></script>
    <!-- our custom modules -->
    <script type="module">

    </script>
</head>

<body>

    <div class="container mx-2">
        <div class="row">
            <h1>
                mDIS data
            </h1>
        </div>
        <div class="row">
            <h2>Drillcore Data (accessed via the <code>/api/v1/form</code> API call)</h2>
        </div>
        <div class="row">
            <h3>Important Notes</h3>
        </div>
        <div class="row">
            <ul>
                <li>This page will only work on modern browsers.
                    <a
                        href="https://developer.mozilla.org/en-US/docs/Web/JavaScript/Reference/Global_Objects/Promise#Browser_compatibility">Compatibility
                        table</a>.
                    (Your browser is
                    <script>document.write(navigator.userAgent.replace(/^.+ /, ""))</script>)
                </li>
                <li>You must make sure that you have appropriate access rights to mDIS.</li>
                <li>Username and password can be stored in page "modules/js/logindata.js", for convenience</li>
                <li>Data table should show up a few seconds after page load / password entry.</li>

            </ul>
        </div>
        <div id="hint" class="row">Data Table:</div>
        <div class="row">
            <table id="mdisdata" class="table table-striped table-bordered"></table>
        </div>
    </div>
</body>

</html>
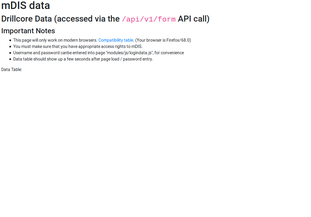
Open this file as a webpage in a modern web browser. On my computer, the URL is https://data.icdp-online.org/mdis/dseis23/apitest.html. On your computer, it might be different.
An almost blank HTML page is shown. There is no data table. This is what you should see, and a preview of the result (when you are done with this tutorial):

In order to display the missing table, you must add some JavaScript code.
Note
There is this text block with an empty script element on line 24:
  <script type="module">

  </script>
Line 2 here corresponds to line 24 in the long code sample before. Put some JavaScript code on that empty line element. (Which code? - read on)
JavaScript Code
The subtasks "login, fetch, display" mentioned above are implemented with 3 functions: loginToDis(), getFromDis(), renderTable().
These functions are already provided to you, in the next 3 code blocks below. They should run unmodified. Cut and paste.
- login to mDIS. The first function,
loginToDis(), uses the/api/v1/auth/loginAPI method. It will return a JSON object with ~ 6 text entries; for details see auth-login documentation. We need thetokenitem, e.g.{"token":"...-2Q..."}, for future logins. We'll send this token (instead of a password) along as an HTTP header field in all future requests:
Authorization: Bearer DssMim-...
fetch some data. The second function,
getFromDis(), gets some corebox data from mDIS via the/api/v1/formAPI method. (Aconsole.log()statement inside the function body prints a string such asSuccess! Found 276 recordsto the Browser console.)display data as a table. The third function,
renderTable()will put a wide, striped data table on the web page.
This is the code that does the work mentioned in the "What the JavaScript code does" paragraph above. Put the following snippet into the empty <script> </script> element on line 24 of the apitest.html HTML page that you've just created.
import {
  loginToDis,
  getFromDis,
  titleCase,
  renderTable
} from "./js/modules/apitest.js"
import { logindata } from "./js/modules/logindata.js"

var token = ""
var apicalldata = {}
var mdisdata = {}
if (!logindata.password || !logindata.username) {
  [logindata.username, logindata.password] = prompt(
    "Enter username and password separated by blank",
    "user2 user2_password"
  ).split(" ")
}

logindata.url = `${logindata.urlhost}/${logindata.urlpaths[0]}`
loginToDis(logindata)
  .then(function(response) {
    token = JSON.parse(response).token
  })
  .then(
    _ => {
      console.log("Login successful! got token " + token)
      apicalldata = {
        url: `${logindata.urlhost}${logindata.urlpaths[1]}`,
        authheader: `Bearer ${token}`
      }

      getFromDis(apicalldata)
        .then(function(response) {
          mdisdata = JSON.parse(response)
        })
        .then(_ => {
          renderTable(mdisdata, $)
        })
    },
    _ => {
      console.log("Login unsuccessful!")
      $("#hint")
        .text("Login unsuccessful!")
        .css("color", "red")
    }
  )
After entering this, the rendering of the data table still does not happen. We have not yet provided actual implementations of the functions loginToDis, getFromDis, and renderTable. We will do this now.
Again, using only copy-and-paste, you must place the code that contains the functions loginToDis(), getFromDis, renderTable() into 2 appropriate files.
The code snippets are provided for you here. Copy them one after the other.
Create a new directory web/js/modules/, and in there create two empty files, web/js/modules/apitest.js, and web/js/modules/logindata.js.
Contents of file web/js/modules/logindata.js:
export let logindata = {
  username: "",
  password: "",
  urlhost: `${location.protocol}//${location.host}`, // "https://data.icdp-online.org/mdis/dseis23",
  urlpaths: [
    // should always be first item in array
    "/api/v1/auth/login",
    // get all cores for exp. 1, site 41, hole 205 from the mDIS
    "/api/v1/form?name=cores&per-page=5000&page=0&sort=id&filter[expedition_id]=1&filter[site_id]=41&filter[hole_id]=205"
  ]
};
Editing this file is optional. You can put your username and password in there. Then, you will no longer be prompted to enter a username and password. You can also edit the hole_id and other query string parameters.
Contents of file web/js/modules/apitest.js:
The JavaScript code of the function loginToDis() is highly verbose with lots of comments and error handling. Adapted from examples found on the Mozilla Developer Network, mdn. Do not modify it.
/**
   * Login to mDIS asynchronously and return a Promise to give us an Authorization token
   */
export function loginToDis(logindata) {
  // Create new promise with the Promise() constructor;
  // This has as its argument a function
  // with two parameters, resolve and reject
  return new Promise(function (resolve, reject) {
    var formData = new FormData(); // Currently empty
    formData.append("username", logindata.username);
    formData.append("password", logindata.password);
    // Standard function to load something from the web
    var request = new XMLHttpRequest();
    request.open('POST', logindata.url);
    request.responseType = 'text';
    // When the request loads, check whether it was successful
    request.onload = function () {
      if (request.status === 200) {
        // If successful, resolve the promise by passing back the request response
        resolve(request.response);
      } else {
        // If it fails, reject the promise with an error message
        reject(Error('Cannot login to mDIS; error code:' + request.statusText));
      }
    };
    request.onerror = function () {
      // Also deal with the case when the entire request fails to begin with
      // This is probably a network error, so reject the promise with an appropriate message.
      reject(Error('Cannot send data. There was a network error.'));
    };
    // Send the request
    request.send(formData);
  });
}

/**
 * Make a single authorized API call to mDIS, and return a Promise with
 * a response to be processed in a then() function.
 * apicalldata is a JS object with 2 keys: url and authheader
 */
export function getFromDis(apicalldata) {
  return new Promise(function (resolve, reject) {
    var request = new XMLHttpRequest();
    request.open('GET', apicalldata.url);
    request.setRequestHeader("Authorization", apicalldata.authheader);
    request.responseType = 'text';
    request.onload = function () {
      if (request.status === 200) {
        resolve(request.response);
      } else {
        reject(Error('Cannot get data from mDIS; error code:' + request.statusText));
      }
    };
    request.onerror = function () {
      reject(Error('There was a general network error.'));
    };
    request.send();
  });
}

export function titleCase(str) {
  str = str.toLowerCase().split(' ');
  let final = [];
  for (let word of str) {
    final.push(word.charAt(0).toUpperCase() + word.slice(1));
  }
  return final.join(' ')
}

export function renderTable(mdisdata, $) {
  // console.log(mdisdata.items[0]);
  let i = 0;
  let columns = Object.keys(mdisdata.items[0]).map(k => (
    {
      targets: [i++],
      render: function (data, type, full, meta) {
        // handle NAs
        return full[k] ? full[k] : '';
      },
      defaultContent: '.',
      title: titleCase(k.replace(/_+/, " "))
    }
  ));
  // console.log(columns)
  $('#mdisdata').DataTable({
    dom: 'lfirtip',
    select: true,
    data: mdisdata.items,
    columns: [],
    columnDefs: columns
  });
}
The code uses native JavaScript Promises because it is an idiom widely used currently. Moreover, the chained do_this().then() style allows for a "separation of concerns".
Again, this is what you should see at the end of this tutorial:
Tutorial 2: In a Browser console
This tutorial is very similar to the JavaScript/Browser example shown above. However, physical access to the file system is not necessary. There is no need to create or copy files. Run everything in a browser console, by copy-and-paste. Unlike the tutorial above (which creates a pretty table), the end result of this tutorial is "only" some mDIS data displayed in the Browser console.
Open the console with CTRL+SHIFT+K.
Use a modern web browser to execute the following. (List of browsers supporting the code sample below.)
Important: Open a new Browser tab. Navigate to an instance of the mDIS, but do not log in. I have access to https://data.icdp-online.org/mdis/dseis23/, but the URL to your mDIS is likely different.
Advanced
Opening the mDIS page in its own browser tab is necessary to avoid security problems (JS-sandboxing issues and cross-domain access restrictions).
Do the following all in the browser tab that you have just opened.
Type F12, or Shift-Ctrl-K. Execute the JavaScript code below in the browser console that belongs to the mDIS browser tab.
Optional: Empty the Browser Console to get rid of older, irrelevant warnings and error messages. To remove them, click on the trash bin icon in the top left corner of the console.
Your task
- Copy function definitions into the console
- Set credentials
- Enter JS code that fetches the data from mDIS.
- See JSON data object appear in the console.
Detailed instructions:
- Copy function definitions. Copy this JavaScript code into the console, hit the "Enter" key. (Alternatively, if you are on Firefox, you can open the JavaScript Scratchpad with
Shift + F4, paste code into that window, click "Run").
Definitions of loginToDis() and getFromDis(), for copy and paste:
function loginToDis(logindata) {
  return new Promise(function (resolve, reject) {
    var formData = new FormData(); // Currently empty
    formData.append("username", logindata.username);
    formData.append("password", logindata.password);
    var request = new XMLHttpRequest();
    request.open('POST', logindata.url);
    request.responseType = 'text';
    request.onload = function () {
      if (request.status === 200) {
        resolve(request.response);
      } else {
        reject(Error('Cannot login to mDIS; error code:' + request.statusText));
      }
    };
    request.onerror = function () {
      reject(Error('Cannot send data. There was a network error.'));
    };
    request.send(formData);
  });
}

function getFromDis(apicalldata) {
  return new Promise(function (resolve, reject) {
    var request = new XMLHttpRequest();
    request.open('GET', apicalldata.url);
    request.setRequestHeader("Authorization", apicalldata.authheader);
    request.responseType = 'text';
    request.onload = function () {
      if (request.status === 200) {
        resolve(request.response);
      } else {
        reject(Error('Cannot get data from mDIS; error code:' + request.statusText));
      }
    };
    request.onerror = function () {
      reject(Error('There was a general network error.'));
    };
    request.send();
  });
}
- To set mDIS credentials and specify API call details, enter this code into the console:
let logindata = {
  "username": "user2",
  "password": "user2password",
  "urlhost": `${location.protocol}//${location.host}`,
  "urlpaths": [
    "/api/v1/auth/login",
    "/api/v1/form?name=cores&per-page=5000&page=0&sort=id&filter[expedition_id]=1&filter[site_id]=41&filter[hole_id]=205"
  ]
};
If you want to execute this code a second time, and the browser console responds with an error SyntaxError: redeclaration of let logindata, you must remove the let from the JavaScript expression.
- Fetch data Fetch the mDIS core data and display it in the console:
var token = "";
var apicalldata = {};
var mdisdata = {};
if (!logindata.password || !logindata.username) {
    [logindata.username, logindata.password] = prompt("Enter username and password separated by a blank", "user2 user2 password").split(' ')
}

logindata.url = `${logindata.urlhost}/${logindata.urlpaths[0]}`;
loginToDis(logindata).then(function (response) {
    token = JSON.parse(response).token;
}).then(_ => {
    console.log("Login successful! got token " + token);
    apicalldata = {
        url: `${logindata.urlhost}${logindata.urlpaths[1]}`,
        authheader: `Bearer ${token}`
    };

    getFromDis(apicalldata).then(function (response) {
        mdisdata = JSON.parse(response);
    }).then(_ => {
        console.log(mdisdata);

    });
}, _ => {
    console.log("Login unsuccessful!");
});
This is what you should see:

The > Object item in the console can be inspected interactively. It contains a property items, an array of 276 objects representing the 276 core datasets from the mDIS database.
You can copy this object to the clipboard and then paste it into your favorite editor for further processing.
Tutorial 3: As a Node Script
This tutorial is also very similar to the JavaScript/Browser example shown above. However, everything is run on the command line. There is no need to open a browser, and there are no cross-domain issues. The data can be saved to disk, which is difficult to achieve with the browser console. However, you need to have the NodeJS JavaScript runtime installed and need to know what it is and how it can be used. Run everything from your command line or from inside your IDE.
Task
TBC
coming soon
REST API
Documentation
See REST API page for extensive documentation.